Description
Adding control points is often the easiest and best way to modify the shape of a curve segment within Fidelity Pointwise. When adding one or more control points to a segment, the location of the cursor within the Display window largely affects where and how the new control point(s) will be placed.
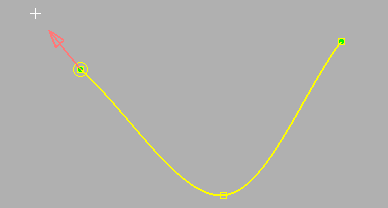
When the cursor is placed before the beginning of a segment (indicated by a control point enclosed in a yellow circle) a vector will appear which will show the current orientation of the cursor in relation to the segment beginning.
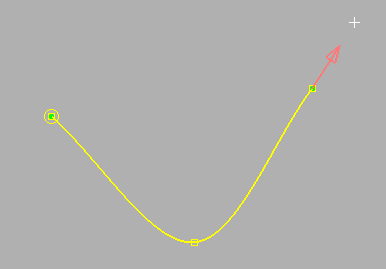
If the cursor is moved to a point after the end of the segment, a vector showing the orientation of the cursor in relation to the segment end will be shown. Left-clicking on a point past either location, segment beginning or end, will create a new control point extending the existing segment. Depending on the location of the control point and the selected Segment Type, the shape of the segment may also change.
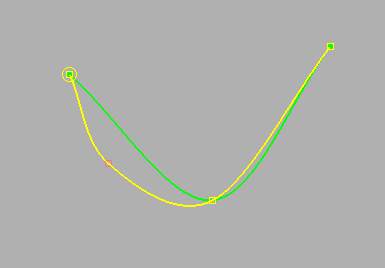
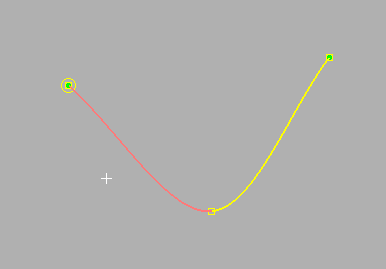
Adding a control point to the interior of a segment to change its shape requires that the cursor be placed at the location between the two control points where it should be added. At this point, the segment in which the control point will be added should show up highlighted in pink.
Once the location is left-clicked with the mouse in the Display window, the new control point will show up highlighted in pink on top of the modified segment shape shown in yellow. A copy of the original segment will still be shown (in green) until the edits to the curve have been saved by clicking OK. After clicking OK, the yellow copy showing the modifications to the curve will replace the old curve in the Display window and in memory.